Are you facing issues with your ebike controller? Don’t worry, we’ve got you covered! In this article, you will find a comprehensive guide on how to fix your ebike controller and get back to enjoying your rides in no time. Whether it’s a malfunctioning throttle, unresponsive buttons, or erratic power delivery, we will provide step-by-step instructions and troubleshooting tips to help you diagnose and resolve the problem. Get ready to unleash the full potential of your ebike once again!

Identify the Problem
Check for Power
When you’re facing issues with your ebike controller, the first step is to check if there is power reaching the controller. Make sure the battery is properly connected and charged. Check if the power switch is on and inspect the wiring connections to ensure they are secure and not damaged. It’s also a good idea to check if any fuses in the circuit are blown and need to be replaced.
Inspect Wiring Connections
If you have power reaching the controller but are still experiencing problems, carefully inspect the wiring connections. Look for any loose or disconnected wires, as they can cause issues with the functioning of the controller. Make sure all connections are tight and secure, and if you find any damaged wires, make sure to repair or replace them.
Test the Battery
A faulty battery can also lead to problems with your ebike controller. To test the battery, use a voltmeter to check the voltage. If the battery voltage is significantly lower than its rated voltage, it may be time to replace the battery. Keep in mind that different ebike systems may have specific voltage requirements, so consult your manufacturer’s guidelines to ensure you’re testing within the appropriate range.
Check the Throttle
Ensure Proper Installation
A properly installed throttle is essential for the smooth operation of your ebike controller. Ensure that the throttle is securely attached to the handlebars and that all screws or clamps are tightened. Inspect the throttle cable for any signs of damage or wear and replace if necessary. It’s also important to ensure that the throttle is properly calibrated according to the manufacturer’s instructions.
Test with a Multimeter
To check if your throttle is functioning correctly, you can use a multimeter. Set the multimeter to the resistance (ohms) setting and connect the probes to the appropriate terminals on the throttle connector. Gently throttle up and down while observing the resistance reading on the multimeter. If the resistance values are inconsistent or show no change, it may indicate a faulty throttle that needs to be replaced.
Replace if Necessary
If testing reveals a faulty throttle, it’s best to replace it with a new one. Throttles are relatively inexpensive and widely available, so finding a suitable replacement should not be a challenge. Ensure that you choose a throttle that is compatible with your specific ebike model and follow the manufacturer’s instructions for installation.

Inspect the Brake System
Check Brake Sensors
Your ebike controller works in conjunction with the brake system to ensure safe operation. Start by checking the brake sensors, which are responsible for detecting when the brakes are applied. Inspect the sensors for any damage or loose connections. Make sure they are properly aligned and positioned near the brake levers. Adjust or replace the sensors if necessary.
Adjust Brake Levers
Improperly adjusted brake levers can also cause issues with your ebike controller. Ensure that the brake levers are properly aligned and adjusted so that they engage the brake sensors when pressed. Make any necessary adjustments to ensure smooth and responsive braking.
Check Brake Connections
Inspect the wiring connections between the brake system and the ebike controller. Look for loose or damaged wires and ensure they are securely connected. Pay close attention to the connections at the brake sensors and the controller itself. If you find any issues, repair or replace the wiring as needed.
Test the Motor
Check Motor Connections
The motor is a key component of your ebike, and any problems with the motor can affect the performance of the controller. Thoroughly inspect the motor connections, making sure they are securely attached and free from any corrosion or damage. Check both the power connections and the wiring connections to the controller.
Test with Voltmeter
To ensure the motor is functioning properly, you can test it using a voltmeter. Connect the voltmeter to the motor leads and gently throttle the bike. You should see a steady increase in voltage as you increase the throttle. If there are significant voltage fluctuations or no increase at all, it may indicate a faulty motor that requires further inspection or replacement.
Inspect Motor Brushes
If your ebike has a brushed motor, it’s important to inspect the motor brushes. Over time, these brushes can wear down and may need to be replaced. Carefully remove the motor cover and locate the brushes. Check for any signs of excessive wear or damage. If the brushes are worn down, replace them with new ones that are compatible with your motor model.

Examine the Display Unit
Check for Error Codes
Many ebike controllers come with a display unit that provides valuable information about the system. If you encounter issues, check the display unit for any error codes or error messages. These codes can help you identify the specific problem and take appropriate steps to fix it. Refer to the manufacturer’s manual or online resources to understand what each error code means.
Inspect Wiring
Inspect the wiring connections between the display unit and the controller. Look for any loose or damaged wires and ensure they are properly connected. Pay attention to any connectors or plugs that may have come loose over time. If you find any issues, secure the connections or replace any faulty wiring.
Test Display Unit Functions
Test the functions of the display unit to ensure it is working correctly. Cycle through the different modes and settings, check if all the buttons respond properly, and verify if the information displayed is accurate. If you notice any malfunctions or inconsistencies, it may indicate a problem with the display unit that requires further investigation or replacement.
Inspect the PAS System
Test PAS Connections
The Pedal Assist System (PAS) is an important feature of many ebikes. Inspect the PAS connections between the pedal sensor, the controller, and the display unit. Look for any loose or damaged wires and ensure they are securely connected. Make sure the connectors are clean and free from any corrosion.
Check PAS Sensor Magnet Position
The position of the PAS sensor magnet is crucial for accurate pedal assist functionality. Make sure the magnet is properly aligned with the sensor. It should be positioned at a consistent distance and angle to allow for reliable detection of pedal movement. Adjust the magnet position if necessary and ensure it securely attaches to the appropriate location on the bike frame.
Replace PAS Sensor if Required
If your PAS system is not functioning properly, the sensor itself may be to blame. Inspect the sensor for any damage or signs of wear. If you notice any issues, it’s best to replace the sensor with a new one that is compatible with your ebike model. Follow the manufacturer’s instructions for installation and calibration.
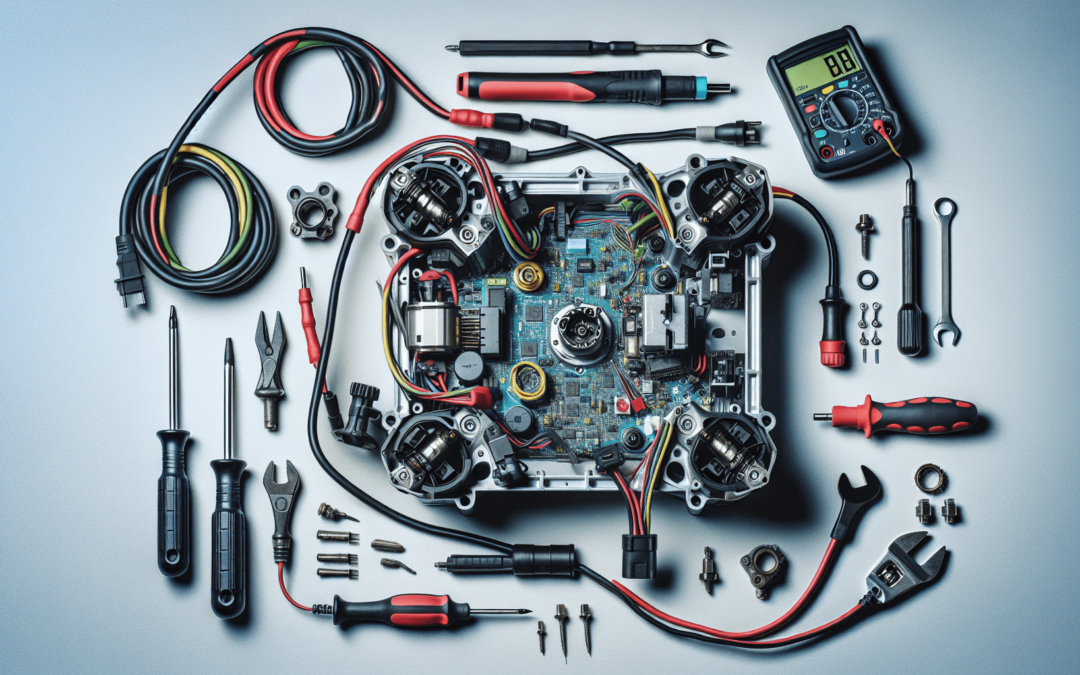
Test the Controller
Check Controller Connections
The ebike controller is the central component that governs the operation of the entire system. Inspect the connections between the controller and other components, such as the battery, motor, throttle, brakes, and display unit. Ensure all connections are secure and free from any corrosion, loose wires, or damage.
Inspect Controller for Visible Damage
Thoroughly inspect the controller itself for any visible damage. Look for signs of moisture, burns, melted components, or any other indicators of a faulty controller. If you notice any issues, it may be necessary to replace the controller with a new one that matches your ebike’s specifications.
Test Controller Capacitors
Capacitors are important components of the ebike controller that store and release electrical energy. Check the capacitors for any signs of damage, such as bulging or leaking. Use a multimeter to test the capacitors for proper functionality. If the capacitors are faulty, they should be replaced with new ones to ensure optimal performance of the controller.
Replace Faulty Components
Order Replacement Parts
If you have identified any faulty components during the inspection and testing process, it’s time to order replacement parts. Contact your ebike manufacturer or a reputable supplier to purchase the necessary components. Make sure you provide accurate information about your ebike model to ensure compatibility.
Follow Manufacturer Instructions
When the replacement parts arrive, carefully read the manufacturer’s instructions provided. Follow the step-by-step guidelines for removing the old components and installing the new ones. Pay attention to any specific requirements or precautions mentioned by the manufacturer to ensure a successful and safe installation.
Install and Test New Components
Once you have installed the new components, conduct a thorough test of the ebike to ensure everything is functioning as expected. Test the power, throttle response, brakes, motor operation, and any other features affected by the replaced parts. Make any necessary adjustments or fine-tuning to ensure optimal performance.
Consider Professional Help
Consult an Expert
If you find the troubleshooting process overwhelming or encounter issues beyond your expertise, it’s wise to consult an expert. Reach out to a knowledgeable ebike technician or contact the customer support of your ebike manufacturer. Describe the specific problem you’re facing and follow their guidance to resolve the issue effectively.
Find a Certified E-Bike Technician
If the problem persists or requires advanced technical knowledge, it may be necessary to seek assistance from a certified e-bike technician. Look for qualified technicians who specialize in ebike repairs in your local area. They can provide professional diagnosis and repair services to ensure your ebike controller is functioning optimally.
Take the E-Bike to a Repair Shop
If you’re unable to resolve the issue on your own or with the help of a technician, consider taking your ebike to a reputable repair shop. These shops have experienced mechanics who can thoroughly inspect your ebike, identify the root cause of the controller problem, and provide expert repairs. Be prepared to describe the issue and any steps you’ve taken to troubleshoot before visiting the repair shop.
Preventive Maintenance
Regularly Inspect and Clean Connections
To prevent future issues with your ebike controller, it’s crucial to regularly inspect and clean the connections. Check for any loose or damaged wires, corrosion, or dirt buildup in the wiring and connectors. Clean the connections using an appropriate electrical contact cleaner or a mild solvent, and ensure they are securely attached.
Keep E-Bike Controller Dry and Protected
Moisture is a common enemy of electronic components, including ebike controllers. Keep your ebike controller dry and protected from rain, snow, and other sources of moisture. Consider using a protective cover or enclosure for the controller to shield it from the elements. If you do encounter moisture exposure, make sure to let the controller dry thoroughly before using the ebike again.
Follow Manufacturer’s Maintenance Guidelines
Lastly, it’s essential to follow the maintenance guidelines provided by your ebike manufacturer. These guidelines typically include recommendations for regular inspections, lubrication, battery maintenance, and other essential tasks. Adhering to these guidelines can help prevent major issues and ensure the longevity of your ebike controller.
Remember, working on electrical systems can be potentially dangerous, especially if you’re unsure of your abilities. If you’re uncomfortable or unsure about any aspect of troubleshooting or repairing your ebike controller, always seek professional assistance. It’s better to be safe than sorry when dealing with intricate electronic systems. With proper maintenance and timely repairs, you can enjoy the full benefits of your ebike for years to come.