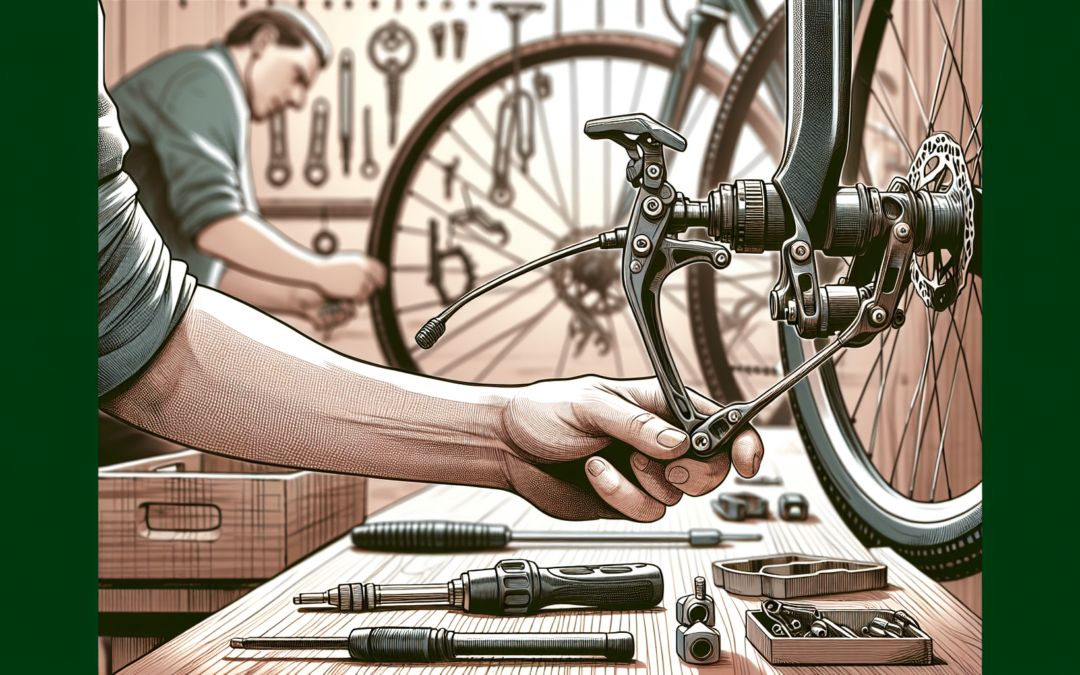
If you own a Bh Emotion Ebike and want to ensure its optimal performance, one crucial aspect to consider is adjusting the brakes. Properly adjusted brakes are not only essential for your safety, but they also improve the overall riding experience. In this article, we will guide you through the step-by-step process of adjusting the brakes on your Bh Emotion Ebike, ensuring a smooth and controlled stopping experience. So, let’s grab our tools and get ready to fine-tune those brakes for an enjoyable and secure ride!


Preparation
Gather the necessary tools
Before you start adjusting the brakes on your BH Emotion ebike, it’s important to gather the necessary tools. Here’s a list of tools you’ll need:
- Allen wrench set
- Screwdriver set
- Cable cutter
- Pliers
- Rag or towel
Having these tools on hand will make the process much easier and ensure that you have everything you need to properly adjust your brakes.
Ensure safety
Safety should always be a top priority when working on your bike. Before you begin adjusting the brakes, make sure you are in a safe and well-lit area. It’s also a good idea to wear gloves to protect your hands and eye protection to shield your eyes from any debris that may fly off.
Additionally, check the condition of the brake pads and cables. If they’re worn out or damaged, it’s important to replace them before attempting any adjustments. Riding with faulty brakes can be extremely dangerous, so don’t take any risks – replace any worn or damaged parts before proceeding.
Position the bike
To make it easier to access the brakes, position your BH Emotion ebike in a bike stand or secure it using a bike repair stand. This will allow you to work on the brakes without the bike moving or falling over, ensuring your safety throughout the process. Now that you have your tools ready and your bike properly positioned, let’s move on to inspecting the brakes.
Inspecting the Brakes
Check brake pads
Start by inspecting the brake pads. Look at the material of the pad – it should have a thickness of at least 3mm. If the pads are too thin or worn down, it’s time to replace them. Additionally, check for any signs of damage or uneven wear. If you notice any problems with the brake pads, it’s important to replace them before proceeding with the adjustments.
Examine brake levers
Next, examine the brake levers. Give them a squeeze and check if they feel loose or tight. A loose brake lever may indicate that the brake cable needs adjustment. If the lever feels tight or sluggish, it could mean that the brake caliper needs adjustment. It’s important to have smooth and responsive brake levers for optimal braking performance.
Inspect brake cables
Inspect the brake cables for any signs of fraying, rust, or damage. Damaged cables can affect the performance of your brakes, so it’s important to replace them if needed. Check the cables for any loose connections or excessive slack. Ensure that the cables are properly secured and don’t have any kinks or twists.
Once you’ve thoroughly inspected the brakes, it’s time to move on to adjusting the brake pads.
Adjusting Brake Pads
Loosen the brake caliper
To adjust the brake pads, start by loosening the brake caliper. Locate the Allen screw or nut that holds the caliper in place and use the appropriate Allen wrench or screwdriver to loosen it. You don’t need to remove the screw completely – just enough to allow for adjustment.
Align the brake pads
Once the caliper is loosened, position the brake pads so that they are evenly aligned with the rim of the wheel. This ensures that the brake pads make even contact with the rim when you apply the brakes. Use your fingers to adjust the position of the brake pads, making sure they are not rubbing against the tire or the rim.
Tighten the brake caliper
After aligning the brake pads, tighten the brake caliper back up. Secure the Allen screw or nut, making sure it is tight enough to hold the caliper in place. Be careful not to overtighten, as this can cause unnecessary wear on the brake pads. A snug fit is sufficient to keep the caliper secure and ensure smooth braking.
With the brake pads properly adjusted, it’s time to move on to adjusting the brake levers.
Adjusting Brake Levers
Identify the adjuster barrel
To adjust the brake levers, you’ll need to locate the adjuster barrel. This is usually located on the brake lever itself, near the handlebar. Look for a small barrel-shaped component that can be turned using a screwdriver or Allen wrench. Familiarize yourself with the location of the adjuster barrel before making any adjustments.
Make adjustments
To adjust the brake levers, turn the adjuster barrel clockwise or counterclockwise, depending on the desired effect. Turning it clockwise will tighten the brakes, while turning it counterclockwise will loosen them. Make small adjustments and test the brake lever pressure after each turn to ensure that you’re achieving the desired result.
Remember that a properly adjusted brake lever should have a firm but not overly tight feel when squeezed. Aim for a balance between responsiveness and ease of use. Once you’re satisfied with the brake lever adjustments, it’s time to move on to adjusting the brake cables.

Adjusting Brake Cables
Release cable tension
To begin adjusting the brake cables, release the tension in the cables by unscrewing the barrel adjuster located near the brake levers. Turn it counterclockwise to loosen the tension and provide some slack in the cables. This step is essential for making precise adjustments to the brake cable tension.
Adjust barrel adjuster
Once you’ve released the cable tension, make fine adjustments to the cable tension using the barrel adjuster. Turn it clockwise to tighten the cable tension or counterclockwise to loosen it. Make small adjustments and test the brakes after each turn to ensure that the desired level of tension is achieved.
Test the brakes
After adjusting the brake cables, it’s important to test the brakes to ensure their effectiveness. Squeeze the brake levers and check for a firm and responsive braking action. The brakes should engage smoothly without any delays or excessive play in the levers. If the brakes are not performing to your satisfaction, make additional adjustments to the brake pads or cable tension as needed.
Now that you’ve adjusted the brakes, it’s crucial to check for proper adjustment before finishing up.
Checking for Proper Adjustment
Test the brake lever pressure
After adjusting the brakes, test the brake lever pressure to ensure that it feels comfortable and responsive. The brake lever should offer resistance when squeezed, but it shouldn’t feel too tight or require excessive force. If the brake lever pressure feels off, go back and make any necessary adjustments to the brake pads or cable tension.
Ensure even braking
When you apply the brakes, make sure that both brake pads are making even contact with the rim of the wheel. Uneven braking can indicate that the brake pads are not aligned properly or that there is an issue with the brake caliper. Adjust the brake pads if necessary to ensure a balanced braking experience.
Examine brake pad clearance
Check the clearance between the brake pads and the rim of the wheel. There should be a small gap between the two, ensuring that the brake pads do not rub against the rim when you’re not applying the brakes. If the brake pads are too close to the rim or too far away, make the necessary adjustments to achieve the proper clearance.
With the brakes properly adjusted, it’s time to move on to the final steps.
Final Steps
Double-check all adjustments
Before you finish up, take a moment to double-check all the adjustments you’ve made. Ensure that the brake pads are aligned properly, the brake levers have the desired pressure, and the brake cables have the correct tension. Take a test ride and apply the brakes to see if everything is working smoothly.
Ensure secure fastenings
Check that all fastenings, such as the brake caliper screws or nuts, are securely tightened. Loose fastenings can affect the performance of your brakes, so it’s crucial to ensure a tight and secure fit. This will prevent any unexpected issues while riding and keep you safe on the road.
Clean and lubricate the brakes
After making adjustments, it’s a good idea to clean and lubricate the brakes. Use a rag or towel to remove any dirt, debris, or excess lubricant that may have accumulated during the adjustment process. Apply a small amount of bike-specific lubricant to the brake cables and moving parts, ensuring smooth operation and reducing friction.
Now that you’ve completed the necessary adjustments and final steps, you’re ready to hit the road with confidence in your well-adjusted brakes!
Common Issues and Troubleshooting
Squeaky brakes
If your brakes are squeaking, it could be due to a few reasons. First, check that the brake pads are properly aligned and have sufficient clearance. If they’re rubbing against the rim, this can cause squeaking. Additionally, make sure the brake pads are clean and free from any debris or residue. If the issue persists, consider replacing the brake pads or seeking professional assistance.
Brake fade
Brake fade refers to a loss of braking power and responsiveness. If you notice that your brakes become less effective over time or when used continuously, it may be due to brake fade. This can be caused by a variety of factors, including overheating of the brake pads or a worn-out braking system. To address brake fade, take breaks during long descents to allow the brakes to cool down and consider upgrading to high-performance brake pads or seeking professional assistance.
Uneven brake pads
If one brake pad is wearing down faster than the other, it can lead to uneven braking. This can be caused by misalignment of the brake pads or a bent rotor. Check that the brake pads are properly aligned and adjusted, ensuring even contact with the rim. If the issue persists, inspect the rotor for any signs of damage or warping and consider replacing it if necessary. Seeking professional assistance may be beneficial in resolving this issue.
Professional Assistance
When to seek professional help
While adjusting your bike brakes can usually be done at home, there are instances when professional assistance may be necessary. If you’re unsure about how to properly adjust your brakes or if you encounter any issues that you’re not comfortable troubleshooting, it’s best to seek the help of a professional bike mechanic. They have the experience and expertise to diagnose and fix any problems with your brakes, ensuring your safety and optimal performance.
Choosing a reputable bike shop
When looking for a reputable bike shop, consider asking for recommendations from fellow cyclists or researching local shops online. Read reviews and check for certifications or affiliations that demonstrate their expertise and commitment to quality. Choose a shop that has knowledgeable staff, good customer service, and a track record of providing excellent bike maintenance services. A reputable bike shop will ensure that your brakes are properly adjusted and provide peace of mind knowing that your bike is in good hands.