Have you ever wondered how to transform your ordinary bike into an efficient electric bike? Look no further, as this article provides a step-by-step guide on how to convert a bike to electric. Discover the essential components required, learn about the benefits of an electric bike conversion, and gain valuable insights into the process. Whether you’re a passionate cyclist or simply looking to embrace a more eco-friendly mode of transportation, this guide is your go-to resource for electrifying your biking experience. So, let’s get started and explore the exciting world of electric bike conversions!
Choosing the Right Bike
When it comes to converting a bike to electric, the first step is to choose the right bike. There are a few considerations you should take into account before making your decision. Firstly, think about the type of riding you’ll be doing. Are you planning to use the bike for commuting, off-road adventures, or leisurely rides around town? Your intended use will determine the type of bike that’s most suitable for you.
Some of the common types of bikes suitable for electric conversion include mountain bikes, road bikes, hybrid bikes, and cruiser bikes. Each type has its own advantages and features that may align better with your needs. For example, mountain bikes are well-suited for off-road terrains, while road bikes offer faster speeds on paved roads. Consider the terrain, distance, and speed you’ll be encountering during your rides to help you determine the most appropriate bike type for your electric conversion project.
In addition to the bike type, it’s important to consider certain features that will make the conversion process smoother. Look for a bike with a sturdy frame and fork, as these components will need to support the added weight of the electric components. Additionally, check for a bike with ample clearance between the frame and tires, as this will accommodate the electric motor and battery. Finally, consider the bike’s overall condition, ensuring that it’s in good working order and free from any major mechanical issues.
Understanding the Conversion Process
Now that you’ve selected the right bike for your project, it’s time to understand the conversion process itself. Converting a bike to electric involves adding an electric motor, battery, controller, and other necessary components. This will provide your bike with the extra power and assistance needed for an electric ride.
To begin the conversion, you’ll need to gather the required components. This typically includes an electric motor, a battery, a controller, a throttle, a display, and various wiring and mounting hardware. It’s important to have a basic understanding of wiring and electronics to ensure a successful conversion. If you’re not familiar with these aspects, it may be helpful to consult online tutorials or seek guidance from experienced individuals who have already completed electric conversions.
Gathering the Necessary Tools and Equipment
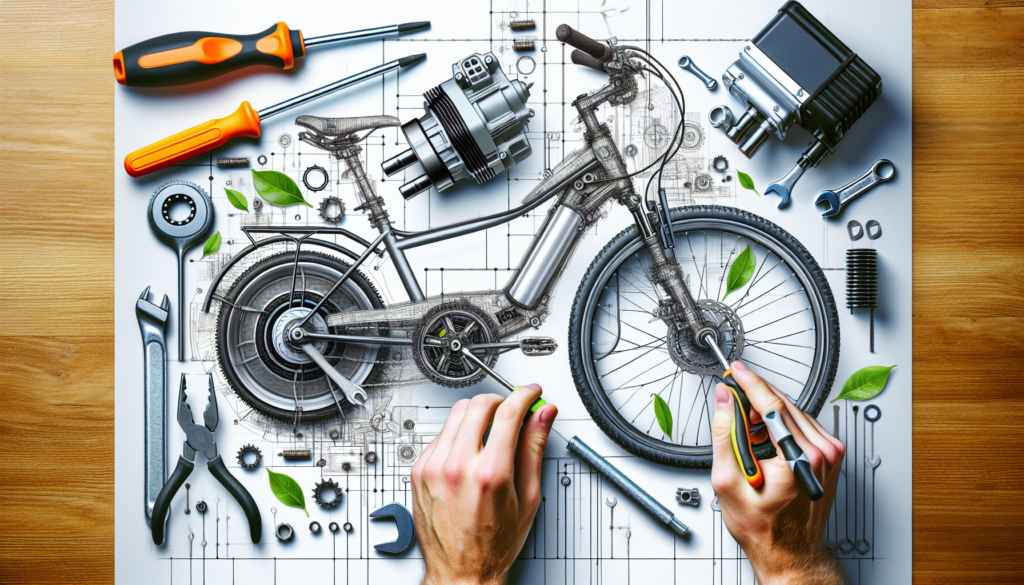
Before diving into the conversion process, it’s essential to have the right tools and equipment on hand. Here is a list of essential tools for the conversion:
- Wrench set
- Screwdriver set
- Allen key set
- Pliers
- Wire cutters and strippers
- Soldering iron and solder
- Multimeter
- Tape measure
- Cable ties
While the basic tools mentioned above are sufficient for the conversion, there are also some recommended equipment that can make the process more convenient. These include a workstand to elevate the bike, allowing for easier access and stability during the installation process. Additionally, having a torque wrench can help ensure that the bolts are tightened to the appropriate specifications, preventing damage or loosening of components over time.
Safety should always be a top priority during the conversion process. As such, there are certain safety equipment items that you should use to protect yourself. This includes safety glasses to shield your eyes from potential debris, gloves to protect your hands, and a dust mask if you’ll be working in dusty environments. It’s also a good idea to have a fire extinguisher nearby in case of any electrical mishaps.
Selecting the Electric Conversion Kit
Choosing the right electric conversion kit is crucial to ensure a successful and efficient conversion. There are several types of electric conversion kits available in the market, each designed for different bike types and purposes. The three main types include front wheel kits, rear wheel kits, and mid-drive kits.
Front wheel conversion kits are the simplest and most straightforward to install. They consist of a motorized front wheel that replaces your existing front wheel, providing propulsion to the bike. These kits are suitable for most bike types and are especially well-suited for bikes with hub brakes.
Rear wheel conversion kits, on the other hand, replace the existing rear wheel with a motorized one. This type of kit offers better traction and control since the motor is located in the rear, providing a more balanced ride. However, they may not be compatible with bikes that have rear hub brakes.
Mid-drive conversion kits are the most advanced option and offer the best performance. They feature a motor that is integrated with the bike’s drivetrain, providing power directly to the pedals. This allows for efficient power transfer and optimal climbing abilities. Mid-drive kits are typically more expensive and require more installation expertise compared to front or rear wheel kits.
When choosing a conversion kit, consider factors such as power output, battery range, ease of installation, and compatibility with your bike. It’s also worth reading reviews and seeking recommendations from other electric bike enthusiasts to ensure you select a reliable and reputable kit.

Removing the Non-Essential Bike Components
Once you have your bike and conversion kit ready, the next step is to remove any non-essential bike components that could interfere with the electric conversion. Start by identifying and removing parts such as the front derailleur, rear derailleur, chain, and crankset. These components are not needed for an electric bike and can be safely taken off.
To properly disassemble the bike, consult the manufacturer’s manual or online tutorials specific to your bike model. Follow the step-by-step instructions to remove components correctly, ensuring that you don’t damage any parts in the process. It’s a good idea to take photos or make notes as you remove each component to aid in reassembly later.
While removing non-essential bike components, it’s important to take precautions to avoid any mishaps. Ensure that the bike is stable and securely propped up on a workstand to prevent it from tipping over. If you’re not confident in your abilities, it may be wise to seek assistance from a professional bike mechanic.
Installing the Electric Conversion Kit
With the non-essential bike components removed, it’s time to install the electric conversion kit. This involves attaching the motor to the bike frame, mounting the battery and controller, and wiring the components for proper functionality.
Firstly, attach the motor to the bike frame, following the manufacturer’s instructions. This typically involves securing the motor to the front or rear dropouts using nuts and bolts. Ensure that the motor is aligned properly and securely fastened to prevent any wobbling or movement during rides.
Next, mount the battery and controller. Depending on the kit, the battery can be attached to the frame using brackets or secured in a rear rack or pannier. The controller is typically mounted near the motor or in a convenient location on the frame. Make sure to follow the manufacturer’s guidelines for proper placement and secure mounting.
Wiring the components is a crucial step to ensure that the electric system functions correctly. Connect the motor, battery, controller, throttle, and display using the provided wiring harnesses. It’s essential to carefully follow the wiring diagram provided by the manufacturer to ensure proper connections and avoid any potential electrical issues.
Integrating the Electric Components with the Bike
Once the electric conversion kit is installed, it’s time to integrate the electric components with the bike. This involves connecting the motor to the drivetrain, installing the throttle and brake sensors, and ensuring proper alignment and adjustment of components.
To connect the motor to the drivetrain, you may need to install a chainring or sprocket onto the crankset. This will allow the motor to transfer power to the bike’s drivetrain, providing assistance when pedaling. Ensure that the chainring or sprocket is properly aligned with the existing gears and that the chain is appropriately tensioned.
Installing the throttle and brake sensors is essential for controlling the electric system. The throttle allows you to adjust the level of assistance provided by the motor, while the brake sensors ensure that the motor cuts off when you brake for added safety. Follow the manufacturer’s instructions to mount these components securely and connect them to the controller.
Proper alignment and adjustment of the components are crucial for optimal performance and safety. Verify that the motor is aligned with the bike frame, the chain is properly tensioned, and the components are securely fastened. Take the time to make any necessary adjustments to ensure smooth operation and minimize the risk of mechanical issues.
Understanding and Adjusting the Electric System
Now that your bike is equipped with the electric conversion kit, it’s important to understand how the electric system works and how to adjust it for optimal performance. Most conversion kits offer different electric modes, such as pedal-assist and throttle-only modes. Take the time to learn about these modes and how to switch between them for different riding situations.
Calibrating the electric system is also crucial to ensure it functions efficiently. This involves setting the maximum speed, adjusting the pedal-assist sensitivity, and fine-tuning other parameters to suit your preferences. Consult the manufacturer’s instructions for guidance on how to calibrate the system properly, or seek assistance from experienced electric bike users or professionals if needed.
In the event that you encounter any issues with the electric system, it’s essential to troubleshoot and resolve them promptly. Common issues may include connectivity problems, battery drain, or error codes displayed on the controller. Refer to the troubleshooting guide provided by the manufacturer or consult online forums and communities for assistance. Regular system maintenance and updates can also help prevent potential problems.

Testing and Safety Measures
Before taking your newly converted electric bike for a ride, it’s crucial to conduct a thorough system test. Double-check all connections and ensure that the motor, throttle, and brakes are functioning correctly. Take a short test ride in a controlled environment to evaluate the performance and responsiveness of the electric system. Make any necessary adjustments or fixes as needed before venturing out on longer rides.
Safety should always be a top priority when riding an electric bike. Ensure that your bike is equipped with proper braking capabilities to handle the added speed and power. Familiarize yourself with the operation of the throttle and brakes to ensure precise control. It’s also important to implement safety measures such as wearing a helmet, using reflective gear for visibility, and following traffic rules and regulations.
Maintenance and Care for Electric Bikes
To ensure the longevity and optimal performance of your electric bike, regular maintenance is essential. Here are some tasks you should incorporate into your maintenance routine:
- Regularly check and tighten all bolts and connections.
- Clean the bike and components, removing any dirt or debris.
- Inspect the tires for wear and tear, and maintain proper tire pressure.
- Lubricate the chain and drivetrain regularly to minimize friction and wear.
- Check the battery charge and, if necessary, recharge it as recommended by the manufacturer.
- Store the bike in a cool and dry environment when not in use, protecting it from extreme temperatures and moisture.
Battery care is particularly important for electric bikes. Follow the manufacturer’s guidelines for charging the battery properly, avoiding overcharging or charging in extreme temperatures. It’s advisable to store the battery at room temperature when not in use and avoid prolonged exposure to extreme heat or cold.
By following these maintenance tasks and caring for the components, you can prolong the lifespan of your electric bike and ensure reliable performance for years to come.
In conclusion, converting a bike to electric is an exciting project that can enhance your cycling experience. By carefully choosing the right bike, understanding the conversion process, gathering the necessary tools and equipment, selecting an appropriate conversion kit, removing non-essential components, installing the electric conversion kit correctly, integrating the components with the bike, adjusting the electric system, testing the bike’s performance, implementing safety measures, and performing regular maintenance, you can successfully convert your bike to electric and enjoy the benefits of electric-assisted cycling. Happy riding!


